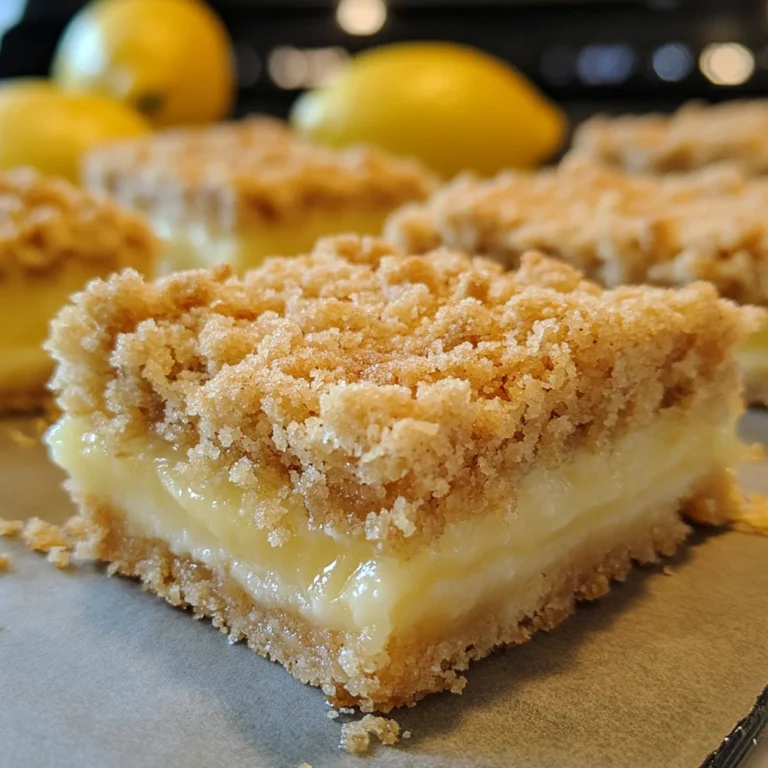
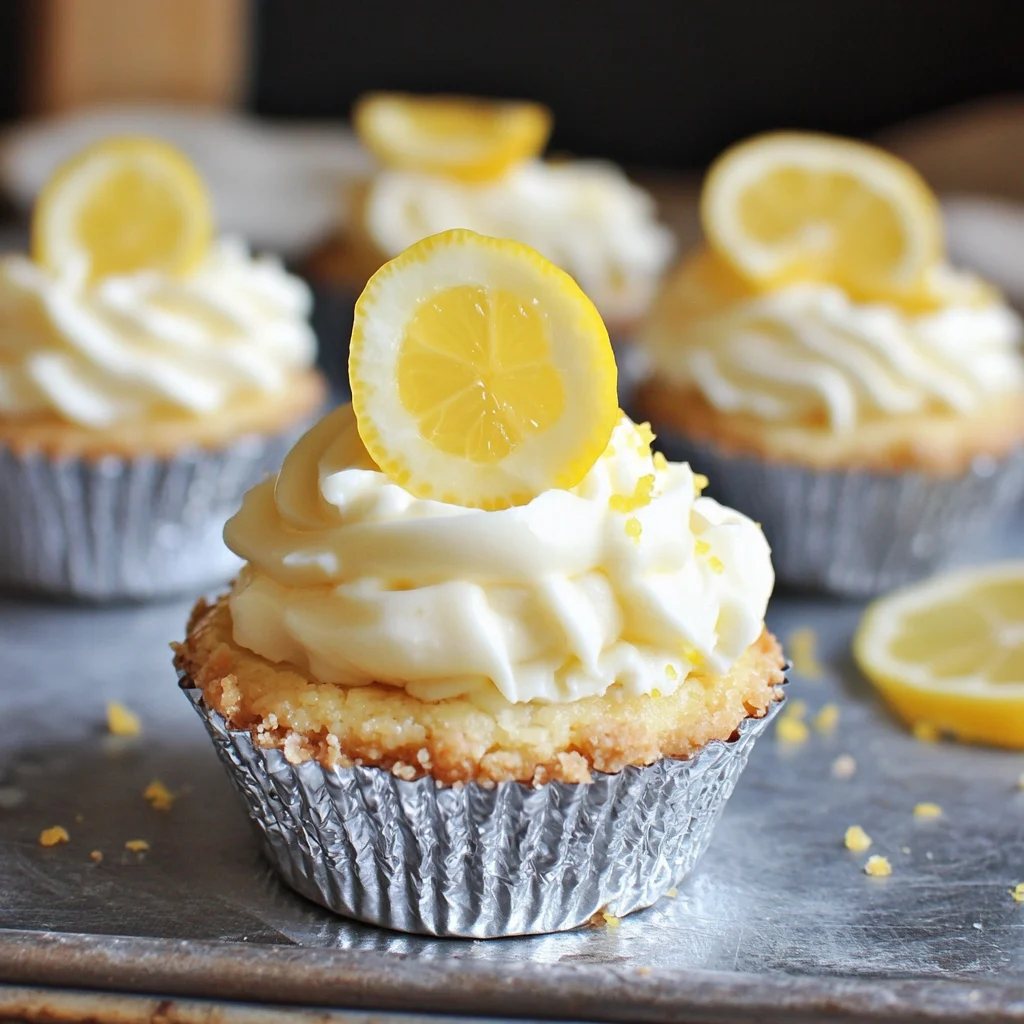
Lemon Dream Dessert Cups
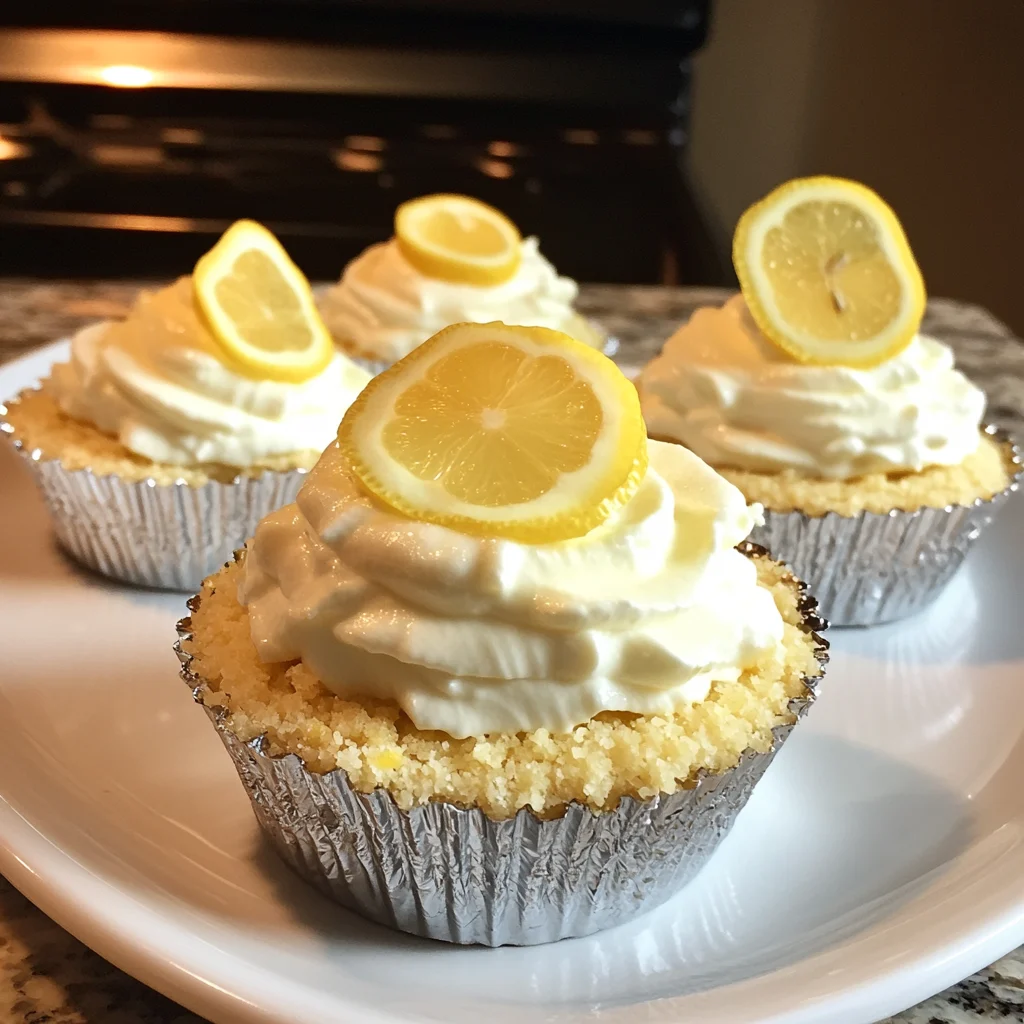
In the realm of desserts, few things are as universally appealing as the combination of creamy and citrusy flavors. Lemon, with its vibrant and tangy profile, has a unique ability to brighten up any dish, offering a refreshing counterpoint to richer, more decadent ingredients. These Lemon Dream Dessert Cups are a testament to this perfect pairing. This recipe is designed to be both accessible and impressive, allowing you to create a gourmet-quality dessert with minimal effort. The inspiration behind these dessert cups comes from the classic lemon cheesecake, but with a lighter, no-bake twist. The goal was to capture the essence of lemon cheesecake in a format that is quicker, easier, and just as satisfying. The result is a dessert that’s bursting with flavor, boasting a velvety smooth texture, and is incredibly easy to portion and serve. Whether you’re looking for a quick dessert to satisfy your sweet tooth or an elegant treat to wow your guests, these Lemon Dream Dessert Cups are the perfect solution. So gather your ingredients, follow the simple steps, and prepare to indulge in a lemon-infused dream!
Ingredients:
- 1 package (8 oz) cream cheese, softened
- 1 can (14 oz) sweetened condensed milk
- 1/3 cup lemon juice (fresh or bottled)
- 1 teaspoon lemon zest (optional)
- 1 teaspoon vanilla extract
- 1 cup whipped topping (Cool Whip), thawed
- 6–8 graham crackers, crushed (or 1 cup graham cracker crumbs)
- 2 tablespoons butter, melted
- Additional whipped topping and lemon slices for garnish (optional)
Preparation:
Step 1: Make the Crust Layer
The foundation of any great dessert is its crust, and these Lemon Dream Dessert Cups are no exception. To begin, you’ll need to create a buttery graham cracker crust that provides the perfect textural contrast to the creamy lemon filling. Start by gathering your graham crackers. You can use either pre-crushed graham cracker crumbs or crush them yourself. If you’re crushing them yourself, place the graham crackers in a zip-top bag and use a rolling pin to crush them into fine crumbs. Alternatively, you can use a food processor for a quicker and more uniform result.
Once your graham crackers are crushed, transfer them to a small mixing bowl. Melt two tablespoons of butter in the microwave or on the stovetop, and then pour the melted butter over the graham cracker crumbs. Mix well until the crumbs are evenly coated with the butter. The butter helps to bind the crumbs together and adds a rich, savory flavor that complements the sweet lemon filling.
Now, it’s time to assemble the crust in your dessert cups. Spoon 1–2 tablespoons of the graham cracker mixture into the bottom of each cup. Using the back of a spoon or your fingers, gently press down on the crumbs to create a compact and even layer. This step is crucial to ensure that the crust holds together and doesn’t crumble when you eat the dessert. Once you’ve pressed down the crust, set the dessert cups aside and prepare the lemon cream filling.
Step 2: Prepare the Lemon Cream Filling
The heart of these Lemon Dream Dessert Cups lies in the luscious lemon cream filling. To achieve the perfect texture and flavor, it’s essential to start with softened cream cheese. Remove the cream cheese from the refrigerator about 30 minutes before you begin, allowing it to come to room temperature. This will ensure that it blends smoothly without any lumps.
In a large mixing bowl, beat the softened cream cheese using an electric hand mixer or a stand mixer fitted with a whisk attachment. Beat the cream cheese until it’s light, fluffy, and completely smooth. This may take a few minutes, so be patient and scrape down the sides of the bowl as needed to ensure even mixing.
Once the cream cheese is smooth, gradually add the sweetened condensed milk. Pour it in slowly while continuing to beat the mixture. The sweetened condensed milk adds sweetness and contributes to the creamy texture of the filling. Next, add the lemon juice, lemon zest (if using), and vanilla extract. The lemon juice provides the signature tangy flavor, while the lemon zest intensifies the lemony aroma and adds a subtle complexity. The vanilla extract enhances the overall flavor profile, adding a hint of warmth and depth.
Continue to beat all the ingredients together until they are fully combined and the mixture is silky smooth. Be careful not to overmix at this stage, as it can cause the filling to become too thin. Once the filling is smooth and creamy, set it aside and prepare to fold in the whipped topping.
Step 3: Fold in the Whipped Topping
To achieve the light and airy texture that defines these Lemon Dream Dessert Cups, it’s essential to gently fold in the whipped topping. Using a rubber spatula, carefully fold the thawed whipped topping into the lemon mixture. Be gentle and avoid overmixing, as this can deflate the whipped topping and result in a denser filling. The goal is to incorporate the whipped topping while maintaining its light and airy consistency.
Fold the whipped topping in until it’s just combined, leaving some streaks of white throughout the mixture. This will give the filling a beautiful marbled appearance and ensure that it remains light and fluffy. Once the whipped topping is fully incorporated, your lemon filling is ready to be layered over the graham cracker crust.
Step 4: Fill the Dessert Cups
With the graham cracker crust prepared and the lemon cream filling ready, it’s time to assemble the Lemon Dream Dessert Cups. You have two options for filling the cups: you can either spoon the lemon filling over the crusts or use a piping bag for a more elegant presentation.
If you’re using a spoon, simply scoop the lemon filling into each dessert cup, filling it to the top. If you prefer a more polished look, transfer the lemon filling to a piping bag fitted with a large round tip. Pipe the filling into each cup, swirling it around to create a visually appealing design.
Once the cups are filled, smooth the tops with the back of a spoon or spatula. This will create a clean and even surface for garnishing. If you’re planning to add a swirl of whipped topping on top, make sure the surface is smooth to provide a good base.
Step 5: Chill and Set
After filling the dessert cups, it’s crucial to chill them in the refrigerator for at least 2 hours, or until the filling is firm and chilled through. This chilling period allows the flavors to meld together and the filling to set properly, resulting in a dessert that’s both delicious and structurally sound.
Cover the dessert cups with plastic wrap or lids to prevent them from absorbing any odors from the refrigerator. Place them in the refrigerator and allow them to chill undisturbed for the recommended time. The longer they chill, the better the texture will be.
Step 6: Garnish and Serve
Once the Lemon Dream Dessert Cups are fully chilled and set, it’s time to garnish and serve. Before serving, top each cup with a swirl of whipped topping. You can either use store-bought whipped topping or make your own by whipping heavy cream with a little sugar and vanilla extract.
For an extra touch of elegance, garnish each cup with a lemon slice or a sprinkle of lemon zest. The lemon slice adds a pop of color and reinforces the lemony flavor, while the zest provides an aromatic burst that enhances the overall sensory experience. Arrange the garnished dessert cups on a serving platter and present them to your guests. These Lemon Dream Dessert Cups are best enjoyed cold, so make sure to serve them immediately after garnishing.
COOKING Rating:
Easy
Serving Suggestions:
These Lemon Dream Dessert Cups are versatile and can be served in various ways. They make an excellent standalone dessert for any occasion, from casual family dinners to elegant dinner parties.
Tips:
- For a richer flavor, use full-fat cream cheese.
- If you don’t have graham crackers, you can use other types of cookies, such as vanilla wafers or shortbread cookies.
- To make the dessert cups even more decadent, add a layer of lemon curd between the crust and the filling.
- If you’re short on time, you can use store-bought lemon filling instead of making your own.
- For a gluten-free version, use gluten-free graham crackers or almond flour for the crust.
Prep Time:
20 minutes
Cook Time:
0 minutes
Total Time:
2 hours 20 minutes (includes chilling time)
Nutritional Information:
(Note: Nutritional information is approximate and may vary based on specific ingredients and portion sizes)
Calories:
Approximately 300 per serving
Protein:
Approximately 4 grams per serving
Sodium:
Approximately 150mg per serving
Conclusion
These Lemon Dream Dessert Cups are a testament to the fact that simple ingredients and straightforward techniques can yield extraordinary results. The combination of the buttery graham cracker crust, the creamy lemon filling, and the light whipped topping creates a symphony of flavors and textures that is both refreshing and satisfying. Whether you’re a seasoned baker or a novice in the kitchen, this recipe is designed to be accessible and enjoyable. So go ahead, gather your ingredients, and embark on a culinary adventure that will transport you to a lemon-infused dreamland. These dessert cups are perfect for any occasion, from casual family gatherings to elegant dinner parties. They are sure to be a hit with your guests and will leave them craving more. Don’t be surprised if this becomes your go-to dessert recipe for years to come. Enjoy!
5 Questions and Answers About This Recipe
Q1: Can I use a different type of crust instead of graham crackers?
A: Absolutely! While graham crackers provide a classic and delicious base, you can certainly experiment with other types of cookies. Vanilla wafers, shortbread cookies, or even crushed Oreos (without the filling) can be used as a substitute. For a gluten-free option, consider using gluten-free graham crackers or a crust made from almond flour and butter. Each alternative will impart a slightly different flavor and texture, so feel free to choose the one that best suits your preferences.
Q2: Can I make these dessert cups ahead of time?
A: Yes, these Lemon Dream Dessert Cups are perfect for making ahead of time. In fact, they benefit from being chilled for at least 2 hours, as this allows the flavors to meld together and the filling to set properly. You can prepare the dessert cups up to 24 hours in advance and store them covered in the refrigerator. Just be sure to add the final garnish of whipped topping and lemon slices right before serving to prevent the whipped topping from deflating.
Q3: Can I adjust the sweetness or tanginess of the filling?
A: Of course! One of the best things about this recipe is that it’s highly customizable. If you prefer a sweeter dessert, you can add a bit more sweetened condensed milk. If you like a tangier flavor, increase the amount of lemon juice. Start with small adjustments and taste as you go until you achieve the perfect balance for your palate. You can also add a touch of lemon extract for an even more intense lemon flavor.
Q4: Can I freeze these dessert cups?
A: While it is technically possible to freeze these dessert cups, it’s not highly recommended. Freezing can alter the texture of the cream cheese and whipped topping, making them less smooth and creamy. If you do choose to freeze them, wrap each cup tightly in plastic wrap and store them in a freezer-safe container. Thaw them in the refrigerator overnight before serving. Keep in mind that the texture may not be quite as perfect as freshly made dessert cups.
Q5: What are some other variations I can try with this recipe?
A: The possibilities are endless! You can add a layer of lemon curd between the crust and the filling for an extra burst of lemony flavor. You can also swirl in some fresh berries, such as raspberries or blueberries, for a fruity twist. For a more decadent version, drizzle some white chocolate ganache over the top. If you’re a fan of coconut, sprinkle some toasted coconut flakes over the whipped topping. Get creative and experiment with different flavors and textures to create your own unique version of these Lemon Dream Dessert Cups.